DIY Succulent Garden by Hello Gem
Posted on
Here, the Americana loving duo of Hello Gem gives us an Autumn-worthy tutorial on how to make an easy centerpiece, a natural desk topper, or the casually perfect gift. So go find some natives (maybe you can ask a friend for clippings?) and enjoy a weekend DIY project that's worthy of Saturday's coming Fall Equinox.
SUPPLIES
Power Drill with Hole Saw AttachmentSucculentsLogReindeer MossGreening Pins

"The future belongs to those who believe in the beauty of their dreams."- Eleanor Roosevelt
Step 1
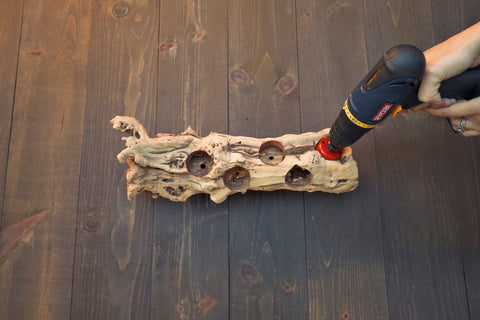
Drill holes in your log in a pattern that is organic and pleasing to you. Anything goes because, just like in nature, plants grow without rhyme or reason. Match the size of your hole saw bit to the rough size of the succulent. We used a 2 3/8" hole bit for ours because our succulents were rather small. Sometimes the log will have natural nooks and crannies -- use them to your advantage!
Step 2
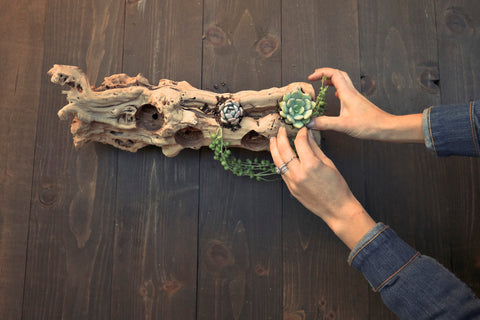
Plant the succulents in your pre-dilled holes. Dust the excess dirt off the succulents and place them accordingly. You can also plant your hanging pearl succulents in the same hole as your small succulents. To help hold the hanging pearls in place, use your greening pins.

Step 3
After you complete planting, place moss around each succulent to give your arrangement a finished look. This step covers up any imperfections, like exposed greening pins or gaps in the log. Use additional greening pins to secure the moss in place.


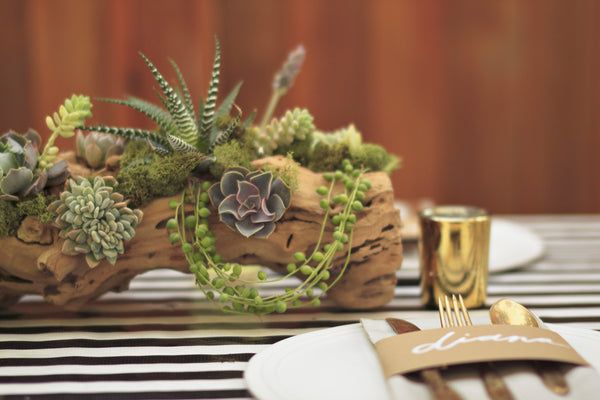
And voila! You have an amazing succulent log arrangement! Place your arrangement in bright light -- they LOVE sun -- and spray with water once a week.

